Category: howto

Home CNC breadboard power adapter

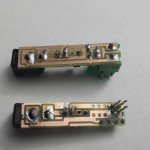
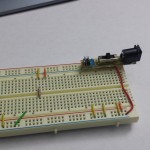
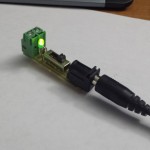
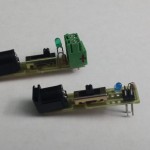
One really nice thing about having a CNC to make PCBs at home is the ability to whip up a quick adapter board in one night. Tonight I needed two adapters for a 5.5mm barrel jack, one to go to wires and one that can plug into a breadboard. Eagle allows you to make a board without a schematic which is exactly what I needed, just draw some traces on copper and route it out on the CNC. I used 40-60 mil traces and slapped on random switches I had laying around and an LED with resistor. The boards came out to be about 1.75″x0.4″ and routed perfectly with a 0.8mm router bit. I uploaded a zip with the Eagle board files and G-Code for anyone else who wants them.

bb_jack.zip – Eagle files and G-Code

s1axter

Portable PIC development kit

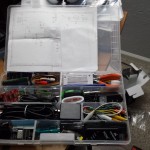
Lately I’ve been moving between 3 different locations and have been trying to do contracting work related to PIC processors. It was really frustrating to have all my development tools and components only at my home office when I was away so much. The solution was to add what I needed to one portable kit to take from location to location. My first attempt was a small plastic toolbox, but that was quickly filled and always seemed to be a mess. Next I tried a plastic shoebox from home depot for $0.99. This worked well since I could see everything that was in it, however it was a pain to carry around since there was no handle and it didn’t fit into a bag nicely. The solution I came up with was a plastic parts bin with moveable seperator walls, like you can find a Harbor Freight or Home Depot. With the movable walls, you can really cram a lot of stuff into them, I was impressed with everything that I got into the bin.

  • 3 pencils
  • 1 pen
  • 6 DIP PIC micocontrollers
  • 1 DIP EEPROM
  • 1 character LCD
  • Double sided tape
  • Wire cutters
  • Spade cutters
  • Plyers
  • hobby knife
  • super glue
  • velcro squares
  • 23 row breadboard
  • Bus pirate
  • Bus pirate cable
  • Tweezers
  • 2 Antistatic bags
  • Electrical tape
  • Alligator clip wires
  • Jumper wires
  • 3×2 programming wire
  • Micro USB phone cable
  • A to B USB cable
  • Voltmeter
  • 5 PIC Microcontroller dev boards
  • 2 Prototype backboard
  • 1 9v packboard
  • 2 crystals
  • USB to serial adapter
  • Serial adapter cable
  • Serial adapter
  • 4G USB drive
  • Mini philips screwdriver
  • Mini flat blade screwdriver
  • Medium dual head screwdriver
  • PICkit3
  • 2 Mini USB cable
  • FTDI TTL serial cable
  • 4 port Mini USB hub
  • AC USB adapter
  • AC 12v adapter
  • USB to 5.5mm barrel jack connector
  • 9v battery to 5.5mm barrel jack
  • 2 Barrel jack breakout boards
Electrical parts

  • Jumper wire
  • Misc pots
  • Misc caps,
  • Buttons
  • LEDs
  • Misc resistors
  • Regulators
  • Header
  • N-chan FETs
  • Misc diodes
  • Solder
  • Barrel jacks

While the box does close and latch, I use two fabric hook and loop straps to make sure it stays closed.  The unit is really compact and fits in any backpack or side bag.  I do have a breadboard I take with me as well and I think I found a small plastic picture box that can hold that so I don’t crush components when it is in a bag.  Here are some pictures too

s1axter

Compile using ffmpeg libraries

Tonight I wanted to play around with the ffmpeg API and see how complicated it was.  I downloaded the example decoding_encoding.c file and tried to compile it against a local build of ffmpeg I made based on their Ubuntu compiling tutorial.

Well let me tell you, ffmpeg sucks at getting people up to speed.  Yeah it’s great they have a few examples on how to use the API, but their makefile is dependent on pkg-config, so it is totally useless for a cross compilation, you would have to add the libs path to your build machine, which is dumb.  Not to mention the libraries they use in the example makefile are missing library references required for the example, leading to a TON of missing symbol errors!  Well after a bunch of searching I found one or two references to people who got the examples built which lead to the commands to build the damn thing on my machine.  This post is for everyone wanting to get started with the ffmpeg API and so I don’t loose it!  Enjoy 🙂

The -I and -L paths should be to your ffmpeg build, mine was obviously /home/s1axter/projects/ffmpeg_sources/ffmpeg_build/

gcc -Wall -I/home/s1axter/projects/ffmpeg_sources/ffmpeg_build/include -c -o decoding_encoding.o decoding_encoding.c

gcc -Wall -L/home/s1axter/projects/ffmpeg_sources/ffmpeg_build/lib -L/usr/lib/i386-linux-gnu -o decoding_encoding decoding_encoding.o -lavformat -lavcodec -lswscale -lavdevice -lavfilter -lfdk-aac -lpostproc -lswresample -lx264 -lavutil -lvpx -lvorbisenc -lvorbis -lmp3lame -ltheora -ltheoraenc -ltheoradec -lva -ldl -lz -pthread -lm

And a Makefile: ffmpeg makefile

Raspberry Pi – Cross Compile & Kernel

This is the first post in a series on getting down into the bits of a Raspberry Pi Linux installation. It assumes familiarity with the Linux build process, gcc, make, apt-get, ssh, etc.

Lately I have been thinking about a project that would require a beefy embedded system, one with embedded Linux, fast, and lots of storage.  It turns out the RaspberryPi has all the requirements for this project, and I have one laying around, so I figured I would pull it out and get a full development toolchain started to see what the little Pi could do. This project might require a Linux driver module, so for that I need to compile the kernel and modules too. All steps were done on an Xubuntu 12.10 32-bit machine with the Ubuntu GCC/binutils/make packages installed.

Image

The first step was getting an image running.  I tried a few and the Arch Linux image is prefect for an embedded project, it doesn’t contain all the X crap by default, it boots  in ~10 seconds (thanks to systemd) and the stock image only takes up about 450Mb on a flash drive, leaving lots of space.  Here is the image (I used the version from Nov 2013), here is how to make an SD card.

Toolchain

The next step was to get a cross compiler toolchain build.  I have seen a lot of posts that say “do an apt-get install gcc-arm-linux-xxxxx on Debian”, that’s all well and good if like relying on Debian, I would like full control over my toolchain, and I don’t want to have to export tons of bash variables for tool locations.  Fortunately, there is an awesome application called crosstool-ng that makes downloading and building a custom compiler and tools a breeze.  I followed this post successfully and put the output directory of the cross compiler binaries within my home directory, this way the ARM compiler isn’t system wide and I can move it where I want it.  I did have to install some packages “sudo apt-get install gperf texinfo gawk libtool automake libncurses5-dev”. The test application compiled without issue and a quick SSH got me “Hello world” on the Pi command line.

Kernel

Rebuilding the kernel and modules seemed a little daunting, but actually it’s pretty easy once you do it. These two references (PDF and elinux) were good for understanding the process.  The kernel for the Raspberry Pi is build from a central git repo, so you just need to clone the repo and you have the whole kernel source all patched and ready to go.

The Arch Linux build has a handy feature enabled, it outputs the kernel config for the running kernel in the /proc directory, which means if you use this config as the base for your config, all the settings match the current kernel, which you know works. Copy the file /proc/config.gz from your Pi, uncompress it to ‘.config’ in the root of your kernel source and it will be read by menuconfig, can’t get easier than that!

Now, because I compiled the toolchain into a local home directory I need to pass the path to it for each call to make.  This isn’t that bad because I plan on making scripts that build the kernel and modules whenever I need them.  Here is an example of how to run menuconfig and the final make:

make ARCH=arm CROSS_COMPILE=/home/s1axter/raspi/toolchain/arm-unknown-linux-gnueabi/bin/arm-unknown-linux-gnueabi- menuconfig
make ARCH=arm CROSS_COMPILE=/home/s1axter/raspi/toolchain/arm-unknown-linux-gnueabi/bin/arm-unknown-linux-gnueabi-

The kernel make builds both the kernel and the modules for that version of the kernel.  You have to copy over both the new kernel and the kernel modules since you can’t use the old modules that exist on the Pi.  Again, rather than export a bash variable like the elinux source says I pass the module folder path in the make command.

make modules_install ARCH=arm CROSS_COMPILE=/home/s1axter/raspi/toolchain/arm-unknown-linux-gnueabi/bin/arm-unknown-linux-gnueabi- INSTALL_MOD_PATH=/home/s1axter/raspi/kernel/modules

After these build steps use sftp or some other means to get the modules and firmware directories in the ‘modules/lib/’ folder into the ‘/lib’ folder on the Pi. The kernel new image is ‘arch/arm/boot/Image’  from the kernel source folder and needs to replace /boot/kernel.img on the Pi (Make a backup, just incase).  I used scp/sftp, so I logged into the Pi and did a ‘sync‘ command to make sure everything was written to the SD card and then ‘reboot’.  I might have been lucky but the Pi came back up and my kernel went from 3.10.18 to 3.10.25!

Good luck


C Preprocessor Macro Demo Video

Here is a demo video on using C Preprocessor macros to make your code easier to read and write.

As promised, here is the code in the demo program

And don’t forget to check out the original articles

http://www.mybitbox.com/2012/11/robust-c-code-part-1-c-preprocessor/
http://www.mybitbox.com/2012/12/robust-c-code-part-2-advanced-c-preprecessor/
http://www.mybitbox.com/2012/12/robust-c-code-part-3-wrapping-c/

S1axter

Robust C Code Part 3 – Wrapping C

In the last segment in this series “Robust C Code Part 2 – Advanced C Preprocessor” I talked about the preprocessor concatenation directive.  In this segment I will talk about using the preprocessor to wrap C code, and what an L-value is. Now this is getting a little technical, so you might want to brush up on C.

The macros I defined in parts 1 and 2 of the series are rather simple. Many times I want to wrap multiple C statements in a macro and use them just as a regular statements.  This seems rather straight forward we could do the following

#define setup_some_hardware()            hw_register1=0x12;hw_register2=0x34;hw_register3=0x56

This will work most of the time since the statements are executed one after another, however this is dangerous because the statements are not grouped in the same scope.  You can think of scope as groups of variables that can ‘see’ each other.  If you have 2 functions, one with ‘int x’ inside and one with ‘int y’ inside, the variables can not ‘see’ each other since they are are in different functions, which means you can’t do x=y; they exist in different scope. A new scope can be created with curly braces {}, which means loops, if statement  and functions all have their own scope.  The three statements in the previous macro can exist in different scopes like in this example:

// Check the hardware and enabled if off
if(HWREGISTER.ON == false)
setup_some_hardware();

An if() statement without curly braces {} will execute the single next statement if the condition is true.  This causes a problem because the preprocessor expands the macro to:

// Check the hardware and enabled if off
if(HWREGISTER.ON == false)
hw_register1=0x12;hw_register2=0x34;hw_register3=0x56

This results in hw_register2 and hw_register3 ALWAYS being set and only hw_register1 affected by the if() statement.  In C you can’t have semicolons in parentheses, so what do you do to group the statements? One solution is to add curly braces {} to macros that don’t return a value so all statements are in the same scope. This seems logical however in C you can’t have a semicolon after a brace which means you have some statements with semicolons and some without, which can lead to some really hard to find bugs.

The solution for this problem is to wrap the multiple statements in do{ }while(0). If you took CS101, the do{}while() loop will always allow one execution before evaluating the condition in the while(). Since while(0) is always false any good ANSI C preprocessor will remove the do{}while(0) and only execute the code once. Since the loop uses curly braces to create a new scope, all statements are in the same scope and a semicolon can be used on the statement.

#define setup_some_hardware()            do{hw_register1=0x12;hw_register2=0x34;hw_register3=0x56;}while(0)

// Check the hardware and enabled if off
if(HWREGISTER.ON == false)
setup_some_hardware();

An additional benefit of the scope created by the do{ }while(0) is that new variables can be created in the new scope.

#define swap_int(val1,val2)              do{int tmp; tmp=val1; val1=val2; val2=tmp;}while(0)

if(some_condition)
swap_int(x,y);

A little known/understood element in C is the L-value. L-values can be though of as the value returned from the right side of a C statement to the left side of the statement. a do{ }while() loop has no L-value and will result in a compiler error if an L-value is expected, so any statement that returns a value should NOT use do{ }while(0) wrapping. A good rule of thumb is if the statement returns a value use parathenses, if it doesn’t, use do{ }while(0).

The following is an excerpt from a UART C header which uses the preprocessor to give more developer friendly names to sequences of statements and convoluted register names:

#define uart1_interrupt_rx_enable()      do{IEC0bits.U1RXIE = 1;}while(0)
#define uart1_interrupt_rx_disable()     do{IEC0bits.U1RXIE = 0;}while(0)
#define uart1_interrupt_rx_clear()         do{IFS0bits.U1RXIF = 0;}while(0)
#define uart1_interrupt_rx_set()             do{IFS0bits.U1RXIF = 1;}while(0)
#define uart1_interrupt_tx_enable()      do{IEC0bits.U1TXIE = 1;}while(0)
#define uart1_interrupt_tx_disable()     do{IEC0bits.U1TXIE = 0;}while(0)

#define uart1_tx_buffer_full()              (U1STAbits.UTXBF == 1)
#define uart1_tx_last_done()               (U1STAbits.TRMT==1)
#define uart1_rx_overrun_get()           (U1STAbits.OERR)

#define uart1_reset()             do{U1MODE = 0;U1STA = 0;}while(0)
#define uart1_enable()         do{U1MODEbits.UARTEN = 1;}while(0)

All the preprocessor macros that I have shown will compile down into “in line” instructions.  This speeds up execution compared to functions since the processor doesn’t have to create a stack frame and branch to another location in code just to do a simple bit set. The one downside is highly used macros with multiple statements will be injected into the source each time they are used, which can lead to larger code.  I try and keep preprocessor macros short and simple to reduce this.

Robust C Code Part 2 – Advanced C Preprecessor

I my last post ‘Robust C Code Part 1 – C Preprocessor‘ I talked about the C preprocessor and how it can be used to hide registers from the user without adding code space for lots of functions.  In this post I will talk a little more about the preprocessor and some of the more advanced features.

The C preprocessor also takes arguments, just like functions. Take a look at this example

#define days_in_years(value)        (365*value)

int x,y,x;
x = days_in_years(1);
y = days_in_years(10);
z = days_in_years(65);

This code works similar to the code in the first post, it replaces days_in_years(value) with (365*value), the text ‘value’ is replaced with the argument to result in (365*1), (365*10) and (365*65). The C preprocessor isn’t just a copy and paste tool for strings of text, in addition to direct replacement of text the preprocessor allows concatenation of strings using the ‘##’ directive.  Take the following example:

// Allow PortA, pin 1 to be accessed with led1() macro
#define led1(func)  porta_pin_1_##func

// PIC24 PortA pin 1 register macros
#define porta_pin_1_output()               (TRISAbits.TRISA1 = 0)
#define porta_pin_1_input()                (TRISAbits.TRISA1 = 1)
#define porta_pin_1_high()                 (LATAbits.LATA1 = 1)
#define porta_pin_1_low()                   (LATAbits.LATA1 = 0)

This example uses the same port macros as part 1 of this series.  The new line is how to hide register access and name pins in a more developer friendly way.  Read over the next part a few times, I will take it one step at a time.

First the ‘##’ in the macro is the concatenation directive for the preprocessor, it says we should take the argument ‘func’ and replace ‘##func’ with whatever we passed in.  Lets say we have the following in our C code:

led1(somejunktext);

This would replace ‘##func’ in the macro with ‘somejunktext’ and concatenate the text string ‘porta_pin_1_’ with ‘somejunktext’ to make a new sequence of text:

porta_pin_1_somejunktext;

Now, this result is very similar to the format of the pin macros we have listed above, but instead of ‘somejunktext’ the ‘porta_pin_1_’ is followed by ‘output()’, ‘input()’, ‘high()’ and ‘low()’.  Because the preprocessor does direct text replacement you can have these strings of characters as arguments:

led1(output());
led1(high());

This results in:

porta_pin_1_output();
porta_pin_1_high();

Which turns into:

TRISAbits.TRISA1 = 0;
LATAbits.LATA1 = 1;

The really nice thing about using preprocessor string concatenation  is you can switch all references to a pin very quickly with just changing the directive:

// Allow PortA, pin 1 to be accesses with led1() macro (Not used)
//#define led1(func)  porta_pin_1_##
// Allow PortA, pin 4 to be accesses with led1() macro (Now this is on pin 4 and all the code still works)
#define led1(func)  porta_pin_4_##

Now, to really blow your mind, you can use multiple concatenation operators in a single macro, which can allow for lots of macros without the code space required for a function:

#define porta_pin_high(pinnum)       porta_pin_##pinnum##_high()
#define porta_pin_low(pinnum)         porta_pin_##pinnum##_low()

porta_pin_high(1);
porta_pin_high(2);
porta_pin_low(3);
porta_pin_low(4);
porta_pin_high(5);

Multiple concatenation makes the set function I mentioned in part 1 of the series really easy:

#define pin_output(portname,pinnum)       ##portname##_pin_##pinnum##_output()

pin_output(porta,1);
pin_output(portb,2);
pin_output(portb,7);

Take a look at this example of a header file for the PIC24 microcontroller for an idea of what can be done with this technique.

Robust C Code Part 1 – C Preprocessor

For years I tried to write C code for microcontrollers that was robust, modular, and reusable  with limited success.  It always seemed that there was some requirement that caused a module to become dedicated to a specific piece of hardware or switching to another processor caused hours of reworking register bits.  Over the last few years I was exposed to some really cool ways to make C code more robust and flexible which allows code reuse and reduces fat-finger errors of setting the wrong bits.  I wanted to create a series of posts on this and one of the first places to start is using the C preprocessor to make accessing hardware more user friendly.

Microcontroller development differs from operating system development in C in many ways, one of which is accessing hardware directly from the C language. Each microcontroller has special hardware that interfaces with the real world, for example a general purpose IO pin is used to interact with the real world using logic signals (high and low). Accessing the port pins differs wildly from processor to processor, to access the PortA pin 1 of a Microchip PIC24 chip in C would look something like this:

// Make PortA pin 1 an output
TRISAbits.TRISA1 = 0;
// Make PortA pin 1 a high value
LATAbits.LATA1 = 1;

This can look a little confusing to some, it would be much easier if there was a function that the developer could call, for example pin_output(porta,1), which would do this for you.  Now you could make a function that does that, however since microcontrollers usually have limited FLASH and RAM, making functions for each register and bit can get out of hand quickly.  The solution is the C preprocessor. The preprocessor uses ‘directives‘ which are like instructions that get run before the compiler. Some directive examples are #define, #include, and #pragma. The #define directive replaces sequences of text in C sources.  If you have ever wrote basic C the following macro will look familiar:

#define DAYS_IN_A_YEAR    365

The C preprocessor searches for the sequence of characters DAYS_IN_A_YEAR in the C source and replaces it with the numbers 365.  No checking is done, so having “#define bit 44” would replace the characters ‘bit’ with 44, which can result in the previous example turning into:

// Make PortA pin 1 an output
TRISA44s.TRISA1 = 0;
// Make PortA pin 1 a high value
LATA44s.LATA1 = 1;

Since there is no TRIS44 register in the PIC24, this won’t compile.  However you can use the direct replacement of the preprocessor to make setting bits very easy to remember and look like functions.  Take the following preprocessor #define directive for example

#define days_in_a_year()    (365)

This replaces days_in_a year() with the characters (365).  This is called a macro. Now you can have some C code that does the following

int x;
x = days_in_a_year();

days_in_a_year() is a macro, not a function, it looks like one, but when the C preprocessor runs you get the following:

int x;
x = (365);

No function code is developed and the code will (most likely) compile to a single instruction or two, to move the value 365 into the variable x. The same ‘function’ trick can be done with the port pin assignment mentioned above.  Take a look at these preprocessor directives

// PIC24 PortA pin 1 register macros
#define porta_pin_1_output()               (TRISAbits.TRISA1 = 0)
#define porta_pin_1_input()                (TRISAbits.TRISA1 = 1)
#define porta_pin_1_high()                 (LATAbits.LATA1 = 1)
#define porta_pin_1_low()                   (LATAbits.LATA1 = 0)

// Make PortA pin 1 an output
porta_pin_1_output();
// Make PortA pin 1 a high value
porta_pin_1_high();

If you put the directives in a header file and include it in your code, you will never have to set a bit register again.  Also, if you move processors, lets say to an Atmel Atmega, you can change the preprocessor directives and all the code is changed automatically:

// Atmel Atmega PortA pin 1 register macros
#define porta_pin_1_output()               (DDRA.1 = 1)
#define porta_pin_1_input()                (DDRA.1 = 0)
#define porta_pin_1_high()                 (PORTA.1 = 1)
#define porta_pin_1_low()                   (PORTA.1 = 0)

// Make PortA pin 1 an output
porta_pin_1_output();
// Make PortA pin 1 a high value
porta_pin_1_high();

That’s it for this post, there is MUCH more you can do with C and the preprocessor, so check back for some more posts in the series.

Eagle PCB files and SVN

So I was searching around and didn’t find many pages talking about revision control of Eagle PCB files so I struck out on my own. I have a license for Eagle 5.X so this post covers binary files (Guess where the previous post came from), not Eagle 6 with the new XML based files.

Version control of almost any file becomes a necessity when you work on multiple computers and recently I have needed to use my laptop in addition to my desktop for PCB development. I have a number of existing Eagle projects and a custom library with parts that aren’t included in the normal Eagle libraries on my main desktop. The projects I have contain a schematic file and a board file in a folder under the eagle home directory and the library is also under the same default eagle folder . I’m not a fan of the default directory since all my project stuff is in multiple SVN folders and directories so this post covers SVN management with different folders from the default eagle directory.

The first thing I did is make sure my library would be shared on both my laptop and desktop, first I copied the library to a new folder under an existing SVN checkout. Add and commit the new folder and library as you would any other file. Next select “Options>Directories” menu from Eagle, click at the end of the Libraries entry box and browse and select the file or (if you know where it is relative to your home directory) add $HOME/path/to/library. After clicking OK you should see the library folder under the “Libraries” main list. On the laptop I updated the SVN folder and added the path to the library in that install of Eagle in the same way. For each Eagle install, make sure you click the dot next to the library name in the main list so Eagle knows you want to use this library for your projects.

Next I copied the schematic and board files for a project to a new SVN folder (it doesn’t have to be the same folder as the library) and did an Add and Commit to the files. Going back to the “Options>Directories” I added a new entry to the “Projects” list the same way as for the library. After clicking OK I had the new directory under the Projects list in the main menu. Again, update the SVN on other computers and point any Eagle install to that local checkout. Opening the schematic and board on my laptop, Eagle knew I wanted to use my custom library and all symbols, packages and devices were exactly as they were on the original computer. Just for a test I moved the old library folder and projects on the original desktop to another directory and the schematic and board for the new SVN project loaded up just fine.

I generate Gerber manufacturing files for Eagle using the gerb274x.cam and excellon.cam CAM files provided by Eagle.  The output files are by default added to the root of the project directory, after generation I move them to a rev_X (rev_A, rev_B, etc) folder in the root of the project.  Use SVN Add and Commit the folder and files to have a history of when different releases were created.

The binary files generated by Eagle can be a little difficult to manage in SVN.  My suggestion is to understand a revision control system such as SVN in depth and follow a set of rules to minimize editing the wrong file (Binary files and revision control article).

Anyone else use revision control for Eagle files?

WordPress Themes