Panoramic photos in Ubuntu
I keep seeing these commercials for Windows Vista and their new panoramic photo maker. Knowing how the Linux hacker scene is, anything that someone makes there is almost guaranteed to be a Linux project to make something close. Well guess what, there is a really easy way to make panoramic photos from multiple still shots in Ubuntu! Further, not only am I going to tell you how to do this, I will show you with some shots of my own.
Requirements
Ubuntu 8.10 – Earlier versions might work but you might have to find updated packages
A digital camera – Almost any will do, I use a 7 MP Kodak pocket camera and it is awesome.
GIMP – For cropping and converting the final TIFF result
The photos
How many and how close together?
From a few experiments I have, three wide overlapping shots or four close overlapping shots make good pans. When you get to more than three wide shots the panorama becomes rather wide and when you view the whole image the details are lost until you zoom in. However don’t let me stop you if you are going for a pan of a long street or city.
Taking the photos
Since lighting changes over time I find that the best pans come from photos taken quickly. Stand in one spot, start from one side and take a few photos with some overlap in the setting. Try not to get anything moving in the photo or you might end up with a dog with no hind legs, or only half a person
Ubuntu
These instructions are for Ubuntu 8.10 Ibex.
Setting up the software
The programs I use to make panoramas are Autopano and Hugin. Open Synaptic and search for autopano, install the autopano-sift package. Next search for and install Hugin. Now there is one little bug in Ubuntu, a dependency for Hugin is the package Enblend which contains the program Enfuse which is used to stitch together the photos. The problem is, as of Dec, 14th 2008, Enfuse is not in the Enblend package! To get Enfuse you must install the Ubuntu Juanty Enblend 3.2 experimental package.
i386:
https://launchpad.net/ubuntu/jaunty/i386/enblend/3.2+dfsg-1
amd64:
https://launchpad.net/ubuntu/jaunty/amd64/enblend/3.2+dfsg-1
I haven’t seen any ill-effects from installing this package but your mileage may vary, just be careful if you use any other programs that require Enblend.
Making a panorama
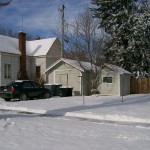
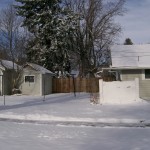
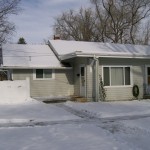
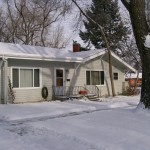
I have some shots of a house I took today that I will use to show you how to make a panorama, here are thumbnails of them.
Autopano
The first step in making the panorama is to map overlapping points in the pictures, to do this we use Autopano. Copy your source pictures to a new directory so the originals are safe. Open a terminal window and navigate to this directory. For the example, I made a folder ‘home_winter’ on my desktop and entered ‘cd ~/Desktop/home_winter’ on the command line to get to that folder.
Now type in ‘autopanog’ in the terminal and hit enter. The Autopano GUI should load. I am not too versed in the options of Autopano but the defaults seem to work well. Click the ‘Add Images’ button and select the images in your directory. Now all that’s left is to click ‘Compute’ and let Autopano map common points between the photos. This should only take a minute or so, it might be longer for larger photos or more than a set of three or four.
Hugin
The software that really stitches the photos together is Hugin. If you installed from Synaptic, you should have ‘Hugin panorama creator’ under your Applications>Graphics menu. To make the panorama we are going to open the project Autopano created and render the final image.
In Hugin, click File>Open and navigate to the folder with the image files, in this directory you should see a few new files and a .pto file (mine is named output.pto). Open the pto file. If all is successful you should be able to click ‘Align’ and after a few seconds see a quick layout of your images in panoramic form. Using this preview window you can play with the layout and enable/disable some of the images.
To make the final panorama, close the preview window and click ‘Create Panorama’ in Hugin, enter a file name such as ‘home_panorama’ (no extension like .jpg or .png) and click save. A whole mess of commands will run and in the end your panoramic shot will be in the directory you chose, named what you selected with _fused.tif added to the end!
If you get an Error: 127 message when clicking ‘Create Panorama’, most likely Hugin can’t find Enfuse. Try re-installing the experimental package listed above.
That’s it, here is my final panoramic shot.
[I would put the raw output image up but it’s TIFF format and 37 Megs! Clicked the cropped one below to see the results]
As you can see Hugin translates your photos via some cool algorithms to make things line up, which results in curved edges and a transparent background. To make a clean rectangular image, open the TIFF in GIMP and select a region inside all the edges. Click Image>Crop To Selection. Next click File>Save a Copy and save to a format of your taste. Here is a cropped JPG of my panorama.
That’s it! Simple really, now go out and make some cool panoramas!
There are a TON of options in both Autopano and Hugin that allow you to match lighting exposures, sync more points between photos, etc. I’m not too sure what they all do, if you have some suggestions for this tutorial, leave a comment below.
-s1axter
29 Comments
Other Links to this Post
-
Panoramic photos in Ubuntu | Ubuntu-News — January 17, 2009 @ 6:10 am
-
links for 2009-01-17 | zoia.org — January 17, 2009 @ 5:04 pm
-
Shownotes 2009.1 « linuxcranks.info/blog — January 18, 2009 @ 1:45 am
-
Panorama Fotos mit Linux at they made me do it — January 19, 2009 @ 3:01 am
-
Panoramic photo, tricks (en) — March 30, 2009 @ 12:53 pm
-
Using Autopano and Hugin to create panoramas in Ubuntu. — November 12, 2012 @ 4:35 pm
RSS feed for comments on this post. TrackBack URI


By 23M, January 11, 2009 @ 6:10 am
I tried to install the newest version of enblend from the launchpad.net link you gave above, but the package doesn’t contain enfuse – can anyone help?
By s1axter, January 16, 2009 @ 10:59 am
Enfuse should be there. I took a look at the changelog and there is the line ‘Added new binary package “enfuse”.’
Once the development deb is installed try running ‘enfuse -h’ in a terminal, if it is there you should get some info about the program. Enfuse is a utility used by Hugin so there won’t be an icon in the Applications menu just for Enfuse.
Let me know how it goes
By Joel, January 16, 2009 @ 7:00 pm
Thanks, your how-to was really helpful.
Regards.
By Sean O'Dea, January 16, 2009 @ 8:22 pm
I’m guessing that’s because you installed from the .deb
In the amd64 package at least there is only enblend so a build from sources is reqd which on Intrepid means sorting out a bunch of dependancies.
I haven’t checked the i386 package (open with Gdebi and check the filelist) but I’m willing to bet it’s the same as it’s also called enblend not enblend-enfuse
By Sean, January 16, 2009 @ 8:55 pm
OK I checked the i386 and no enfuse in there either so it’s some compiler therapy on either architecture.
I suspect this is deliberate as it looks like there’s going to be a seperate enfuse package eventually https://launchpad.net/ubuntu/jaunty/+package/enfuse
By Joel, January 16, 2009 @ 9:01 pm
This is my photo: http://www.flickr.com/photos/jaec95/3202120971/in/set-72157603845900824/
By s1axter, January 17, 2009 @ 12:29 am
Nice shot Joel! Glad the how-to could help
By Micha, January 17, 2009 @ 12:51 am
fotoxx does also a good job in making panoramas. In my opinion not as good as hugin, but it also has a few functions to edit photos.
By Sean, January 17, 2009 @ 11:05 am
So building from the sources will give you both enblend and enfuse. Most of the dependancies are available from synaptic if you have the appropriate repositories enabled but here are a few pointers:
libxmi is actually part of libplot-dev
libclms-dev doesn’t show up in synaptic despite having deb http://security.ubuntu.com/ubuntu intrepid-security main in source.list – get it here for intrepid http://packages.ubuntu.com/intrepid/liblcms1-dev and adjust the url for your version.
openexr is only required if you intent to use ILM’s high def file format
It’s a big build and will take a looooooong time so hasn’t locked up.
Once built and installed you should have enfuse in usr/local/bin as well as enblend.
Enjoy!
Sean.
By Lux, January 19, 2009 @ 9:17 am
Vista´s solution is much easier.
By s1axter, January 19, 2009 @ 7:35 pm
Lux, that may be, however this is a demo of how to do it on Ubuntu.
All I can say is that the majority of Microsoft products I have worked with give you very limited flexibility. The image above of the preview window lets you apply different orientations and reposition the photos to more accurately represent the intent of the panoramic. From my plying around I think you can even stitch 360 degree shots and ‘place’ them on a curved surface!
Take a look at this article: http://www.linuxpromagazine.com/issues/2005/51/360_degree_view/(kategorie)/0
By marvin, January 22, 2009 @ 6:16 am
you can find enfuse ubuntu debs here:
http://packages.ubuntu.com/de/jaunty/enfuse
By Drew, February 2, 2009 @ 10:39 pm
Hey, guys great tutorial, cant wait to try it out. I want to take a 360 photo of my shed. Will this software be able to handle such a tight curve. I guess I just need to take closer photos? Any advice would be great before I start playing
By s1axter, February 4, 2009 @ 9:40 am
Hugin should be able to do that, not too sure how Autopano is going to handle shots that come around to the beginning again, should be an interesting experiment.
To get the best view I would overlap the shots by a good margin. Post a link to your photo when it is done! Good Luck!
By remi, July 15, 2009 @ 3:52 pm
Thanks for your tutorial, first time i start to download an application, run into some problems (no enfuse…), troubleshoot it, run the application and get a result in less than an evening! Brilliant.
By a8ksh4, July 20, 2009 @ 10:38 pm
RE: Lux
“Vista´s solution is much easier.”
Splicing together panoramics in Vista is like growing corn w/ fertilizer made from oil. It seems cheap/easy now, but comes at a huge price later on.
By Colinb, August 3, 2009 @ 10:44 am
In the latest version of Hugin, the functionality of Autopano is built right in, which simplifies things a lot. You might need to install Autopano thru Synaptic to get the plugins, but it’s working for me with Jaunty
By Guilherme Atencio, February 8, 2010 @ 4:07 pm
Thanks A LOT! Worked perfectly!
By Dwayne Degeorge, April 2, 2010 @ 5:40 pm
Cheers very much, I have found this info extremely good!
By Florin, May 13, 2011 @ 5:29 pm
Hugin is a great peace of software, it can do the job by itself (only needs autopano as a plugin). I just tried it in Ubuntu 11.4 and it works like a charm. BTW: Use the Ubuntu Software Center to install it.
Thanks!
By Florin, May 13, 2011 @ 5:31 pm
great “piece” of software
By James McGregor, November 12, 2012 @ 2:54 pm
This article is still very relevant. I am running Ubuntu 12.04 LTS The only difference to the process is that Hugin can be installed via the ubuntu software center. (don’t forget to tick to install the autopano option )!
After I installed I followed the rest of the instructions in the post with fantastic results. excellent article – Thanks
By blades, May 29, 2013 @ 5:22 am
is there a way to make panorama images from command line?